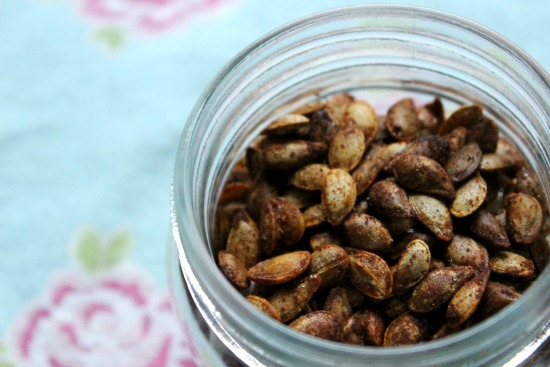
Roasted Butternut Squash Seeds – Oven or Air-Fryer
Here’s how to make roasted butternut squash seeds in the oven or air fryer, as well as some fun savoury and sweet variations on them.
I’m always on the lookout for plastic-free snack ideas, as well as clever tips to reduce food waste.
The other week I was preparing one of my favourite winter vegetables, the butternut squash, for roasting. As I was scooping out the seeds, I got wondering. Rather than composting them, could you roast the seeds, as you would do for pumpkin seeds?


I gave it a go, sprinkling some oil, paprika, and salt on them, and lo and behold, roasted butternut squash seeds. They were so tasty, that I wanted to show you how to make them today. They make a super tasty savoury snack that’s good for you, and so cheap it’s practically free!
The seed yield from butternut squash isn’t that high. It’s about enough for one person. Therefore it’s not really worth using your oven just to cook the seeds. If you’re not roasting your butternut squash then pop the seeds in a sealed container in the fridge and they’ll store for up to three days until you next use your oven. Alternatively, you can pop them in the air-fryer for a super energy-efficient way to roast them.
How to Make Roasted Butternut Squash Seeds


Here’s all you need to know:
Ingredients
- One butternut squash
- 1-2 teaspoons of olive oil
- 1 teaspoon of paprika
- 1/4 to 1/2 teaspoon of salt depending on your taste
Baking Method – In The Oven
- Scoop out the seeds from the butternut squash, like you would normally do.
- Try and remove as much of the butternut squash flesh and stringy bits from the seeds as possible. Don’t worry if you can’t remove every last bit, just as much as you can.
- Give your seeds a good rinse and then pat them dry with a clean kitchen towel.
- Place the seeds on a baking dish and add the oil, paprika and salt. Mix well so the oil and seasoning coat the seeds fairly evenly.
- Arrange the seeds in a fine layer, so that not too many seeds are on top of each other, and roast for about 12-15 minutes in roughly a 180°C oven. Give them a stir halfway through so as not to burn them. (If you’re cooking something at a hotter temperature just keep an eye on them and be prepared to remove them from the oven sooner)
- You’ll hear the seeds popping as they cook – don’t be alarmed! You can tell they’re done when they look a bit brown and crispy on the outside.
Baking Method Two – In The Air-Fryer
If you’d rather roast your seeds in the air-fryer then you can do that too:
- Clean, dry and season your seeds as per the above instructions.
- Pop your seeds in the air fryer. Select the roast function, set it to 180°C, and cook for about 5 minutes before stirring them.
- Roast for a further 5 minutes or so until they are lightly browned and crispy on the outside.
I’ve been air-frying mine lately and they come out just as delicious as oven-roasted ones.
Storage Instructions
You can store your roasted butternut squash seeds in an airtight jar for up to a week. Be warned – mine never last that long! I ate all of the last batch I made while writing this post…!
Variations
There are heaps of variations you could do to roasted butternut squash seeds. Plain salt, chilli, rosemary, cumin, or cinnamon are all ones that spring to mind to make tasty healthy snacks. Alternatively, if you wanted something a bit sweet then vanilla sugar, soft brown sugar, honey, or a touch of maple or golden syrup would all work very well!
Your Top Tips
Do you have any other ideas for leftover butternut squash seeds? I’d love to hear them. Do share in the comments below! There’s also a bit of a debate as to whether you can plant seeds from shop-bought butternut squashes. Have you ever tried this? Did it work?
You can also check out my vegan and vegetarian slow cooker recipes. There’s lots of good stuff you can make with butternut squash in there.
Printer-Friendly Version
If you’d like to print out this recipe you can use this printer-friendly version of my recipe:
- One butternut squash
- 1-2 teaspoons of olive oil
- 1 teaspoon or bell pepper
- 1/4 to 1/2 teaspoon of salt depending on your taste
-
Scoop out the seeds from the butternut squash, like you would normally do.
-
Try and remove as much of the butternut squash flesh and stringy bits from the seeds as possible. Don’t worry if you can’t remove every last bit, just as much as you can.
-
Give your seeds a good rinse and then pat them dry with some kitchen towel.
-
Place the seeds on a baking dish and add the oil, paprika and salt. Mix well so the oil and seasoning coat the seeds fairly evenly.
-
Arrange the seeds in a fine layer, so that not too many seeds are on top of each other, and roast for about 12-15 minutes in roughly a 180°C oven. Give them a stir half way through so as not to burn them. (If you’re cooking something at a hotter temperature just keep an eye on them and be prepared to remove from the oven sooner)
-
You’ll hear the seeds popping as they cook – don’t be alarmed! You can tell they’re done when they look a bit brown and crispy on the outside.


